
There are several purposes why you might want to uninstall Oracle Application Testing Suite ( a.k.a OATS ), It is very important for you to make sure OATS is uninstalled properly and make the proceedings.
Here are some of the purposes why you might want to uninstall
- You want to install latest version of OATS and you already have an older version of it.
- You want to downgrade OATS from newer version.
- Had unsuccessful installation, so you want to remove OATS completely and start fresh.
There could be other purposes as well, we just tried to list the most common situations where you might want to uninstall.
While you want to proceed with the uninstall process, if you want to use your scripts which are already developed, your first step would be to take back up of all them along with all the artefacts of your test automation framework.
Step 1: Uninstall Oracle Application Testing Suite Products
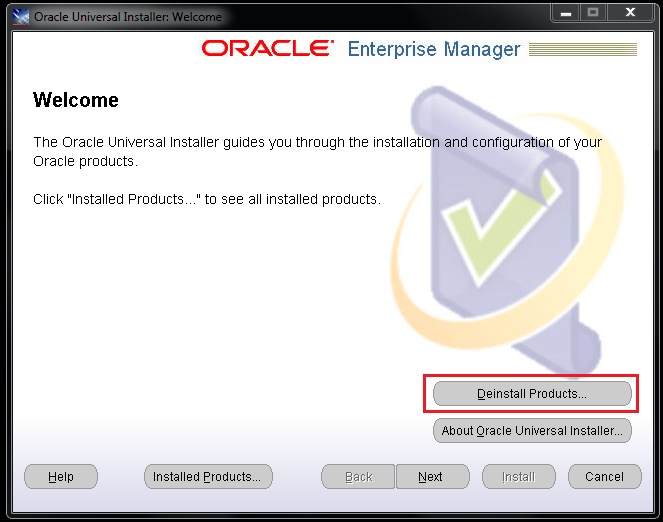
- Run “Setup.bat” ideally present at “<OATS Software Downloaded folder>\setup.bat” ( Always better to “Run As Administrator” ) & click on Deinstall products button.
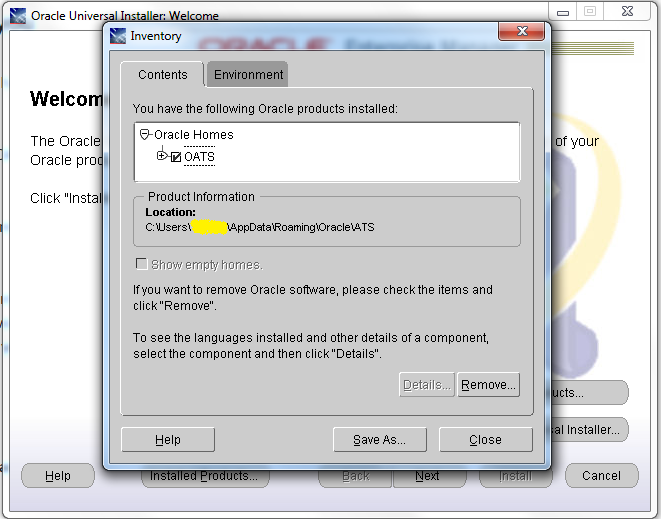
- Expand Oracle Homes Tree Node in “Inventory” window and select “OATS” checkbox.
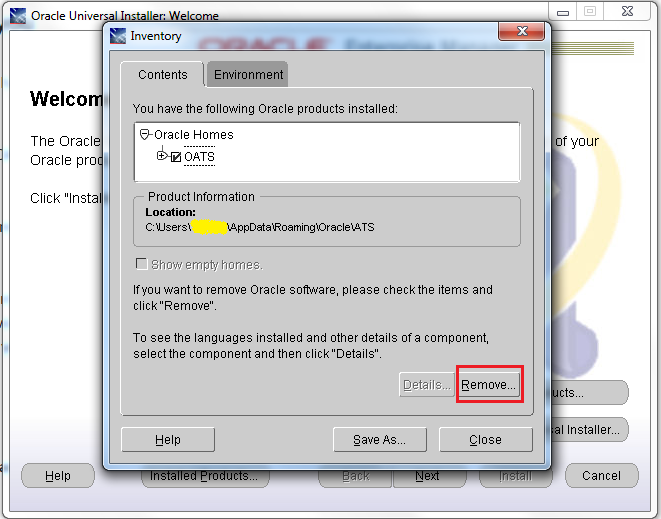
- Click “Remove” button, to start the uninstall procedure.
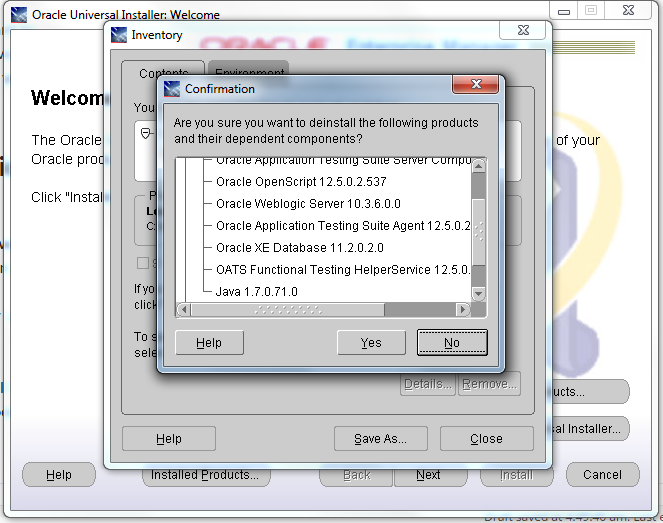
- It may ask for a confirmation from you by listing out all the products which are going to be uninstalled. Click “Yes” to Proceed or Click “No” to go to previous step.
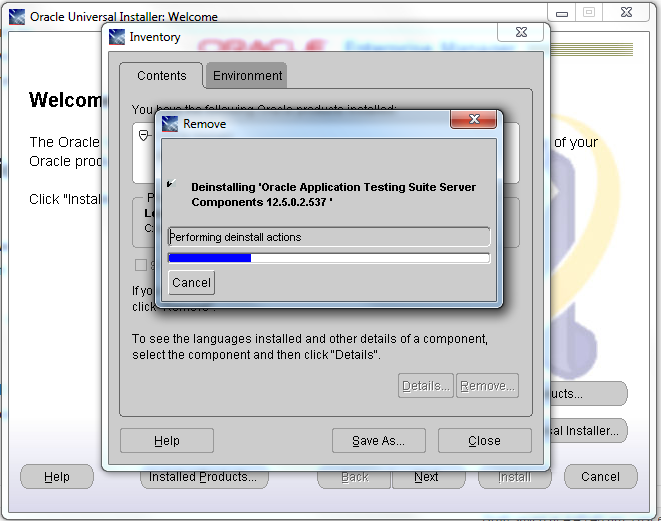
- You might be presented with a progress window “Remove” for uninstall process.
- On successful uninstall of products, you would see a message as “There are no installed products” in Inventory window.
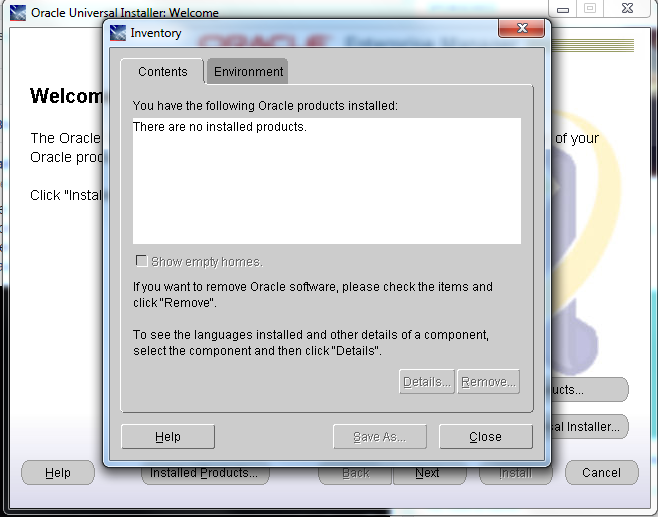
- Click “Close”
- Click “Cancel” button of “Oracle Universal Installer: Welcome” window which got opened at the first step of this section. The window gets closed.
Step 2: Uninstall Oracle XE Database
- There are occasions Oracle XE Database need to be uninstalled separately though we tried to remove them in Step 1.
- Open Control Panel ( Start Menu > Control Panel / open run window and type “control” without double quotes and press enter )
- Open Add/Remove Programs or Program and Features depending upon your Windows version.
- Find and select “Oracle Database 11g Express Edition”.
- Click the “Remove” or the “Uninstall/Change” button from the tool bar, or double-click the item to launch the Install Shield wizard, or right click the desired item and click “Uninstall/Change”
- Click Yes in the dialog box to remove the database.
- Wait for the uninstall to complete successfully.
- Click Finish to close the Install Shield wizard
Some times even after uninstall, traces would be left over, you can launch services window and check if any of the below are still existing, if so you can follow the video to remove them and continue to further steps.
Step 3: Remove or Rename Installation Folder(s)
Post uninstall of products the folders still remain and are supposed to removed by you for keeping it fresh for new installation.
- As mentioned earlier, back up all your script & test automation framework assets / artefacts, especially for the repositories which are present either under your installation folder / user workspace folder.
- Remove or rename the Oracle Application Testing Suite installation directory (the default is C:\OracleATS). ( you may have to sometimes logoff or restart machine to perform this step )
- Remove or rename the “osworkspace” directory in your user profile: C:\Documents and Settings\username\osworkspace (depending upon your Operating System, it may be similar to: C:\Users\username\osworkspace).
- Remove or rename the “Inventory” directory: C:\Program Files\Oracle\Inventory (depending on your Operating System, it may be like: C:\Program Files (x86)\ Oracle\Inventory).
- Remove or rename the file: C:\Windows\rsw.ini ( if it exists )
Step 4: Remove Environment Variable and Browser Properties File
Steps to remove the OATS_HOME environment variable:
- Right click on Computer in Start Menu and select “Properties”
- Click on Advanced System Settings on left side pane of the newly opened Window.
- Click Environment Variables on the Advanced tab of System Properties Window.
- Select the OATS_HOME variable under “System Variables” and click Delete button.
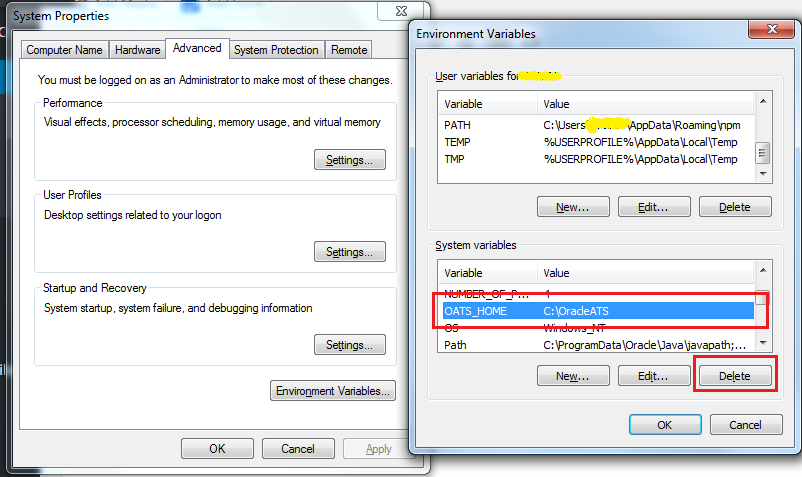
- Close the window.
Note: Please be careful while deleting the environment variables, can cause system failures on deleting wrong variables.
Steps to remove the browserHelper.properties file:
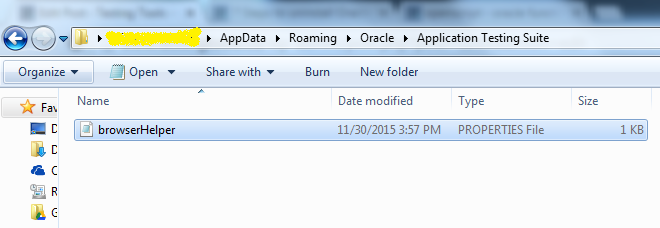
- Open Run window and type “%APPDATA%” with out double quotes and press enter.
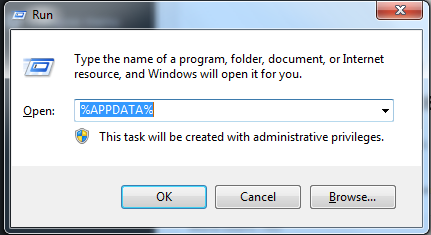
- Navigate to %APPDATA%\Oracle\Application Testing Suite\browserHelper.properties file and delete the file.
Step 5: Remove the “Oracle Application Testing Suite” Services
- Select Run from the Start menu.
- Type cmd and press enter / Click OK button.
- Type the command:
sc delete servicename, where servicename is each of the following:
- OracleATSAgent
- OracleATSServer
- OracleATSHelper
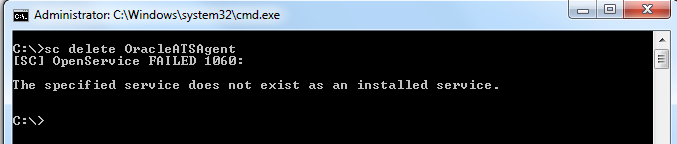
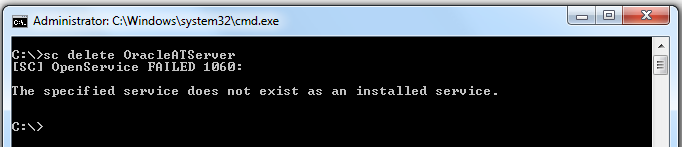

If the message “The specified services does not exist as an installed services” is returned from the program, the service was successfully removed by the previous steps.
Also, please make sure none of the above services are available in services window, you can open services window by giving “services.msc” in run window.
Step 6: Remove the “Oracle Application Testing Suite” Registry Keys
- Type “Regedit” without double quotes in run window and press enter / click OK button.
- Delete the following Registry keys using the Registry Editor:

- HKEY_LOCAL_MACHINE\SYSTEM\CurrentControlSet\Servicese\OracleATSServer
- HKEY_LOCAL_MACHINE\SYSTEM\CurrentControlSet\Services\OracleATSAgent
- HKEY_LOCAL_MACHINE\SYSTEM\CurrentControlSet\Services\OracleATSHelper
If you do not find the keys in the Registry, they were successfully removed by the previous steps. Note: The keys may be found in the different location depends on your Operating System (search by the key to find the correct location).
Step 7: Restart the System
It is always good to restart a machine on completion of install / uninstall process.
Please share your queries through comments, I would be more than happy to help.


I am trying to load test 1,00,000 concurrent virtual users in Oracle load testing , i am unable to find any hardware estimation documenation for OATS ,could you please provide your tips and best practice on this , i am using OAS 13.3
Hi Anbu, thank you for reaching out to us, I replied to your same query on other article Oracle Load Testing, hope it helps.
Hi!
I’m having a problem trying to inspect objects with OpenScript.
I have the automation code i’ve been using with last versions of the same applet, but now it can’t see the paths i’ve mapped before the update (even with the inspect tool).
Can you please help me?
Thanks and have a nice week 🙂
Yes if you are ok to go on screen share, i can try my best to help, please drop your details to testingtools.co@gmail.com also ping me on my contact number +91-9885809854 ( Whatsapp or you can call me )