Once you have successfully installed Latest Android Studio software, you can get started with creating a project in android studio. It is quite simple to create a project using the latest versions of Android studio.
Step by Step instructions to create project in Android Studio:
- Open Android studio tool from Start Menu. It might take a little while to launch.
- Click menu File > New > Project .
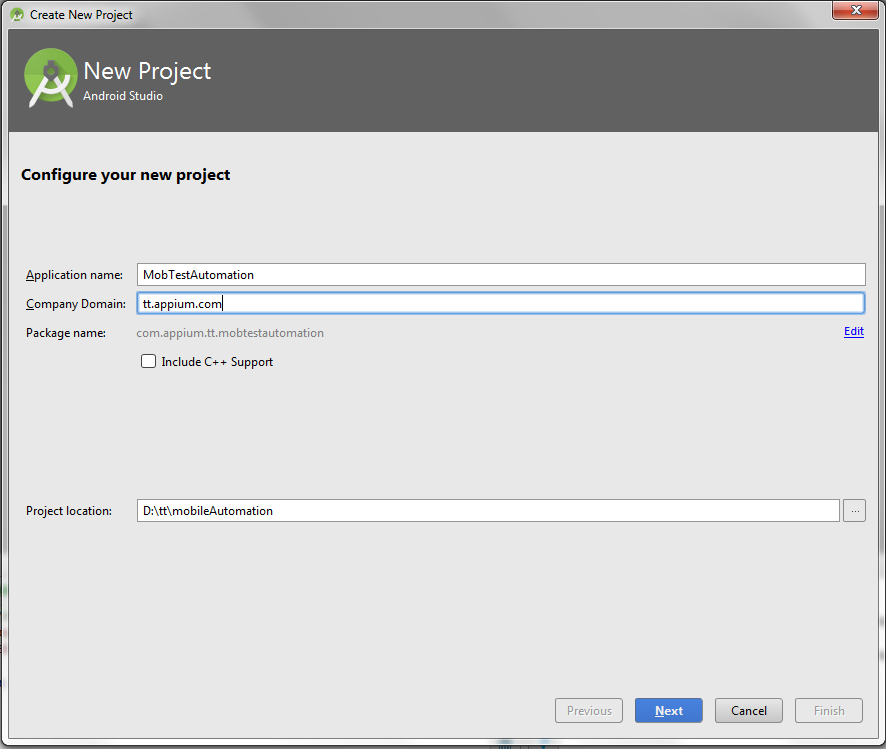
 you will be presented with Create New Project Wizard
 - Give any application name, Company domain that you wish for. Choose the project location as where you want to store the current project and click Next button.

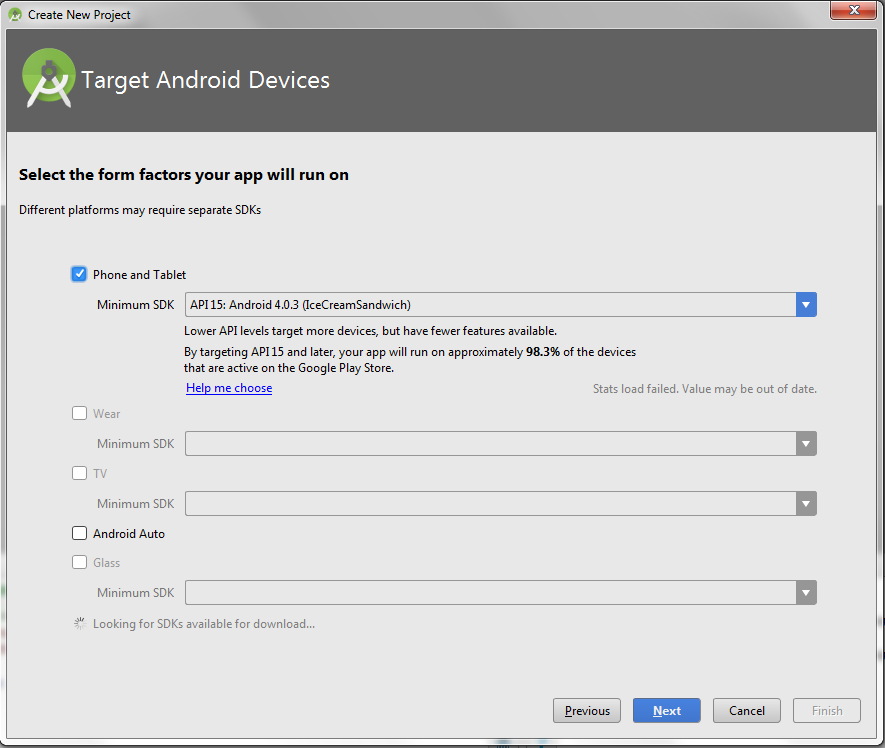
- Select the check box for “Phone and Tablet”, choose minimum Android version that you want to support this project for and click Next button. ( You could choose different other platforms too as per your interest )

- Select the default activity ( Empty Activity ) and click Next button. As we are creating this project for test automation, we may not worry about other activities and just be done with the default one. Click Next to continue.

- You can leave the default values and click Finish button.

- You might be presented with a “Proxy settings” window, this is useful when you are working in an office location where you can access internet only through the proxy. Provide details for HTTP Proxy and Enable HTTPS Proxy with ipaddress and a port. Also, provide credentials for authentication, in case it is required at your office location to access internet.

On completion of creating the project you would be presented with default structure of the project with gradle.
You can explore a little bit by expanding the nodes and on the left side of the pane, mainly you would see sections like app and Gradle Scripts. For creating any test scripts you will have to create a java class under the app / java / test folder.
You have now successfully created a project in android studio, please share any of your queries in form of comments, we would try our best to solve your issues.


